… are not two words that you would ever hear coming out of my mouth in succession, as I’ve written them. And yet, it’s a phrase that I have often heard coming from the mouths of others (and it makes me ponder how anyone can say it). I frequently say either out loud during conversation with someone, or to myself in my head, “life is too short.” Though I’ve reached the ripe old age of 61, there are still so many things left that I would like to do in the short time I still have left on this planet. Of course, one of the curses and blessings at the same time, is that I don’t know exactly how short that time will be. Thankfully I’ve seen many moons, and will hopefully continue along that path.
I haven’t made the time to sit down and pen a blog for the past several days because I was occupied by other things that kept my interest. It’s not because I don’t want to sit down and write, it’s because there are so many things to keep me busy that I find it difficult to make time to write. I honestly don’t know how married people with children do it!
Because I live in a fairly mild region of Northern California, we rarely get harsh winter conditions here (maybe once every 15 or 20 years or so we might see a light “dusting” of snow if the conditions are just right). I’ve lived in other states on the East Coast with harsher conditions, where I had to shovel the snow out of my driveway in the morning to be able to drive to work, but here our winters only get down into the high 30s (F) or low 40s typically. Still, that’s appreciably cold enough to keep one inside their heated house on the weekend until it warms up at least into the upper 40s or low 50s. When that happens I can throw on some sweats and slippers and go out to work in the garage. Since I’m not of retirement age (or financially able to) yet, the evenings and weekends are the only time I have to do some of the work I want to do around my house, or in the garage.
Over the past few months I’ve been working on a specific project that will allow me to work on other project(s) in the future. In one of the corners of my garage I’ve been building an insulated room (for sound, not temperature), with ventilation for the summer months, to house a new 60-gallon air compressor. This will allow me to use air tools to work on the two project cars that I have sitting in my garage, without going deaf from hearing the air compressor running all day while I’m working. That task is now about 98 percent completed, with only a little bit of plumbing for the copper line from my compressor to the hose reel left to do. It has been a slow process partially because I’m a Virgo (at least that’s what the astrologists will tell you). As a Virgo, I’m a bit of a perfectionist, so everything had to be built “just right” during the process (or I had to redo a thing or two to make sure that they were “just right”).

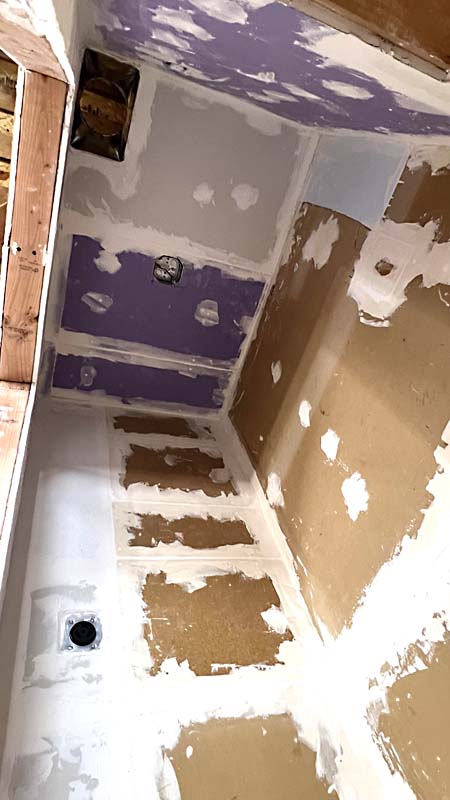
Unfortunately the only way to show you photos from the very beginning would be to rip out all of the work that I’ve already completed and start the entire project over from scratch (and I’m sure you’ll agree with me when I say “I ain’t gonna’ do that”). In that corner of the garage there was a crudely built-in cabinet by the previous homeowner at the top of the space, and an open space below where I formerly kept my toolbox. I had to rip out the “cabinet” before I started my project, then cut back some of the “shelving” to the right to make space for my room. At the time I was just preparing for “future work” and I didn’t think about taking any photos of what I was doing. It wasn’t until I already had the walls framed, electrical circuits wired, walls insulated, and partially covered in drywall that I even thought about documenting what I was doing. To save a little money (have I mentioned that I’m frugal?), I re-used a lot of the old drywall pieces that were still viable, so that’s why there are so many seams and patches. To the right of this paragraph you will see the first picture that I could find in my phone of the project. At this point I had already drilled holes in the concrete slab and inserted the lag shields to mount the compressor to the floor as well.
With the project at this point of completion, I was motivated to keep going. Soon all the walls were covered with drywall. I had to add a little extra joint compound around the 240V outlet that I had installed to make it blend in a little better. I filled the seam between the slab and the foundation with expanding foam insulation. The different pieces of drywall looked like a patchwork quilt by the time I was finished.

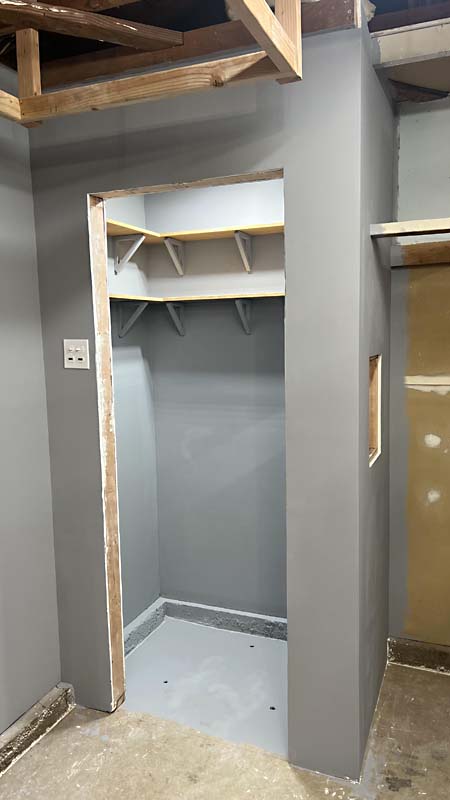
The next step was smoothing all the joints in preparation for some paint. Then I followed up by painting everything a “battleship gray” color . The gray was the natural color of the primer I had bought at Home Depot, but I liked it and it seemed fitting for a garage, so I decided to keep it gray. I just added a few more coats of the primer to cover up any blemishes that might have shown through. I also added a few shelves to the room, above where the compressor would sit. No sense in wasting the space, and I always seem to have too much stuff in the garage anyway. Having the extra storage space will be nice. The hole in the side of the room is where the compressed air will come out through a flexible, high pressure hose and tie into my copper air lines. It will also be covered and insulated by the time the project is finished. At this point (as you might observe) I had installed the light in the ceiling, and also the fans over the ventilation exit hole to help with air circulation (air compressors get a little hot when running).


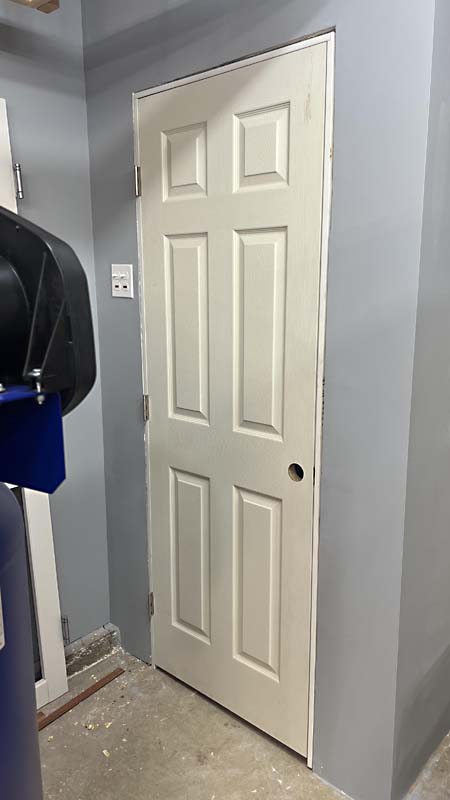
After that it was time to install the door. My Virgo perfectionism poked out its ugly head again, as I stuffed tiny pieces of insulation all around the door frame after installing the door (making sure that it was level, of course). You can see the compressor in the photo, edging closer to the room and just dying to get inside.
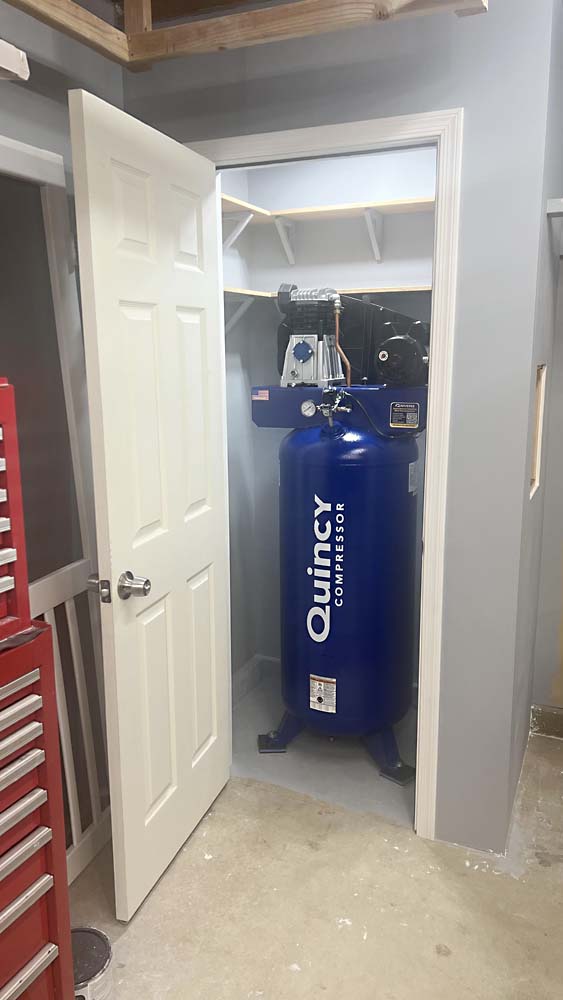
The best laid plans… I hadn’t considered the extra width of the door frame when I planned out my room. However, the compressor just squeaked by as I rocked it back in forth on its feet to get it into the room. Then there was limited room to get it up onto its rear vibration pad and get the bolt into the lag shield in the floor. It definitely required a bit of “lying down on the job” to reach the rear mounting area. Finally, I had the compressor in the room and mounted, snug as a bug in a rug. Because garages typically slope from rear to front (for drainage), I had to make some small custom wedges to put under the feet, to insure that the compressor sat level in place. I bought a small polypropylene kitchen cutting board from Amazon and cut it to size as needed to make my wedges.

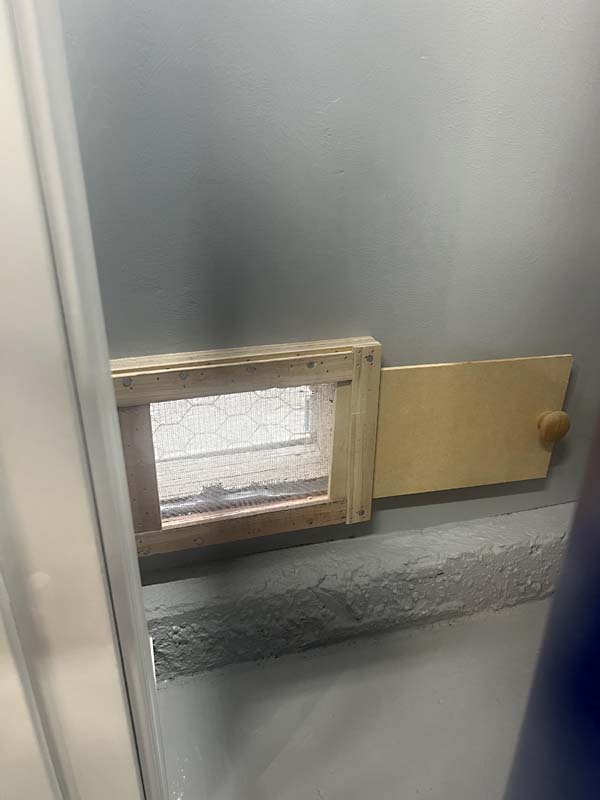
Again, being a little anal retentive, I built a little frame around the intake vent that was installed when the house was built in 1980. I included a little sliding door on it so I could block out some of the cold air in the winter time.
I still need to add a wooden threshold under the door. It will take a bit of custom work as well, due to the slope of the garage floor. Since I’m almost finished with the copper work and I’m eager to get to it, being a Saturday morning, I’ll save photos of that and of the threshold for another post. In any and all cases… I am never bored. Now if I could just find a way to get rid of all those pesky mosquitoes flying around my face as I’m working…

PA

Leave a reply to ponderingabsurdist Cancel reply